
START WITH A CLEAR INSTRUCTION
A simple formula for a useful prompt
Give the editor a specific change, a place to apply it, and the details to retain.
Too vague“Make it look better.”
More specific“Change the red notebook cover on the desk to dark navy blue; keep its size, position, and any text on the cover.”
One caveat applies across all nine examples: requests to retain faces, text, or framing are instructions, so compare those details with the original after processing.
The images below are AI-created illustrations of editing ideas, prepared separately from the suggested prompts. They are not PhotEditor test results.
Background Prompts
Give the scene a new setting. Name the details you want to keep.
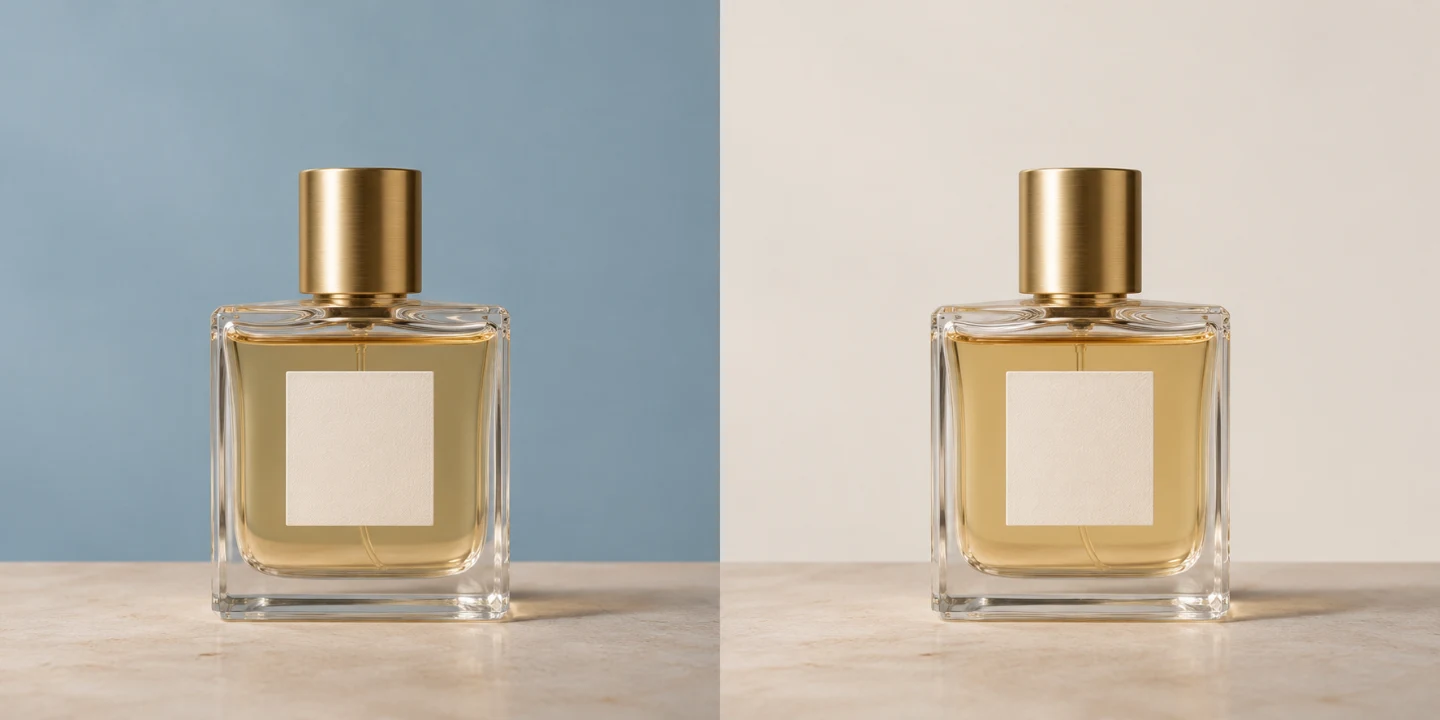
EXAMPLE 02 · PRODUCT BACKGROUND
A new backdrop. The same product details.
- Bottle edges and cap
- Label and reflections
- Surface and contact shadow
Street Portrait → Seaside Promenade
Replace the street behind the woman with a seaside promenade in soft daylight. Keep her face, hair, pink top, jeans, pose, and framing. Match the ground perspective and contact shadows.
Compare her face, clothing, hair edges, and feet with the reference. Check whether the promenade perspective and contact shadows fit her position.
Perfume Bottle → Off-White Studio Backdrop
This prompt is written for a perfume bottle photographed against a simple, uncluttered background.
Replace the backdrop behind the perfume bottle with warm off-white. Keep the bottle, cap, label, and supporting surface. Match the backdrop lighting and contact shadow to the existing bottle.
Inspect the bottle outline, label text, reflections, and contact shadow. A clean background should not come at the cost of altered product details.
Untidy Room → Neutral Wall
Replace everything visible behind the desk and laptop with a plain, neutral light-gray wall; retain the desk surface, laptop, and any objects sitting on the desk; adjust background tone so the overall image reads consistently lit.
Inspect the desk edge, laptop outline, and any cables. If their boundary is unclear, choose a less obstructed reference when available.
Another background idea: street portrait → seaside promenade
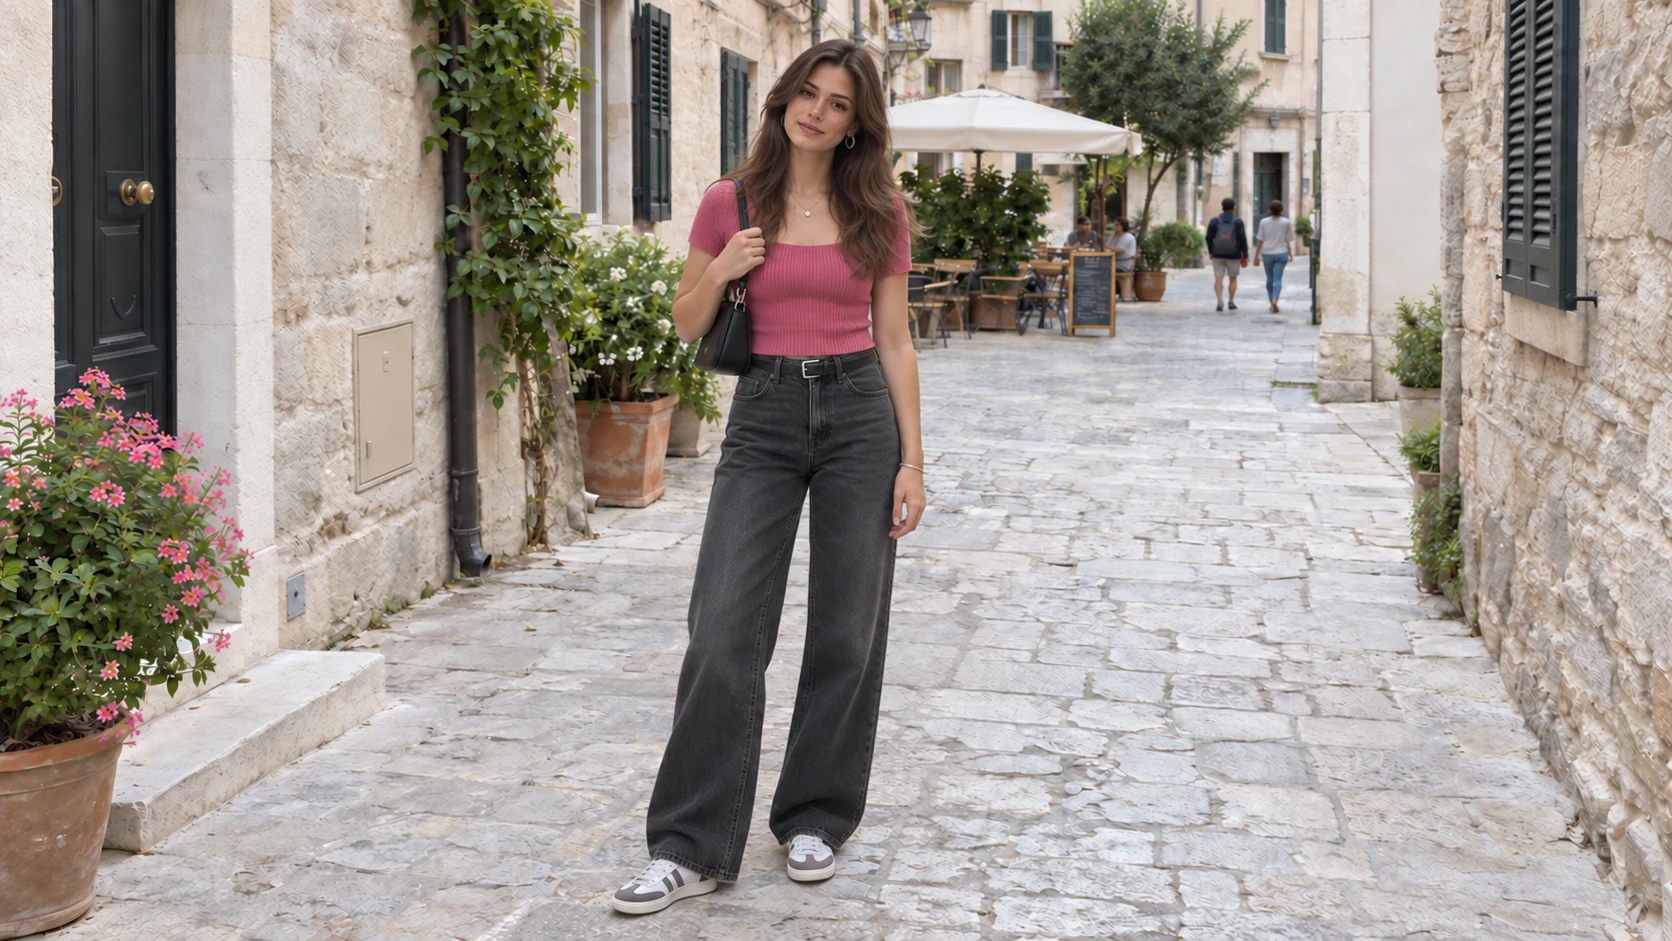
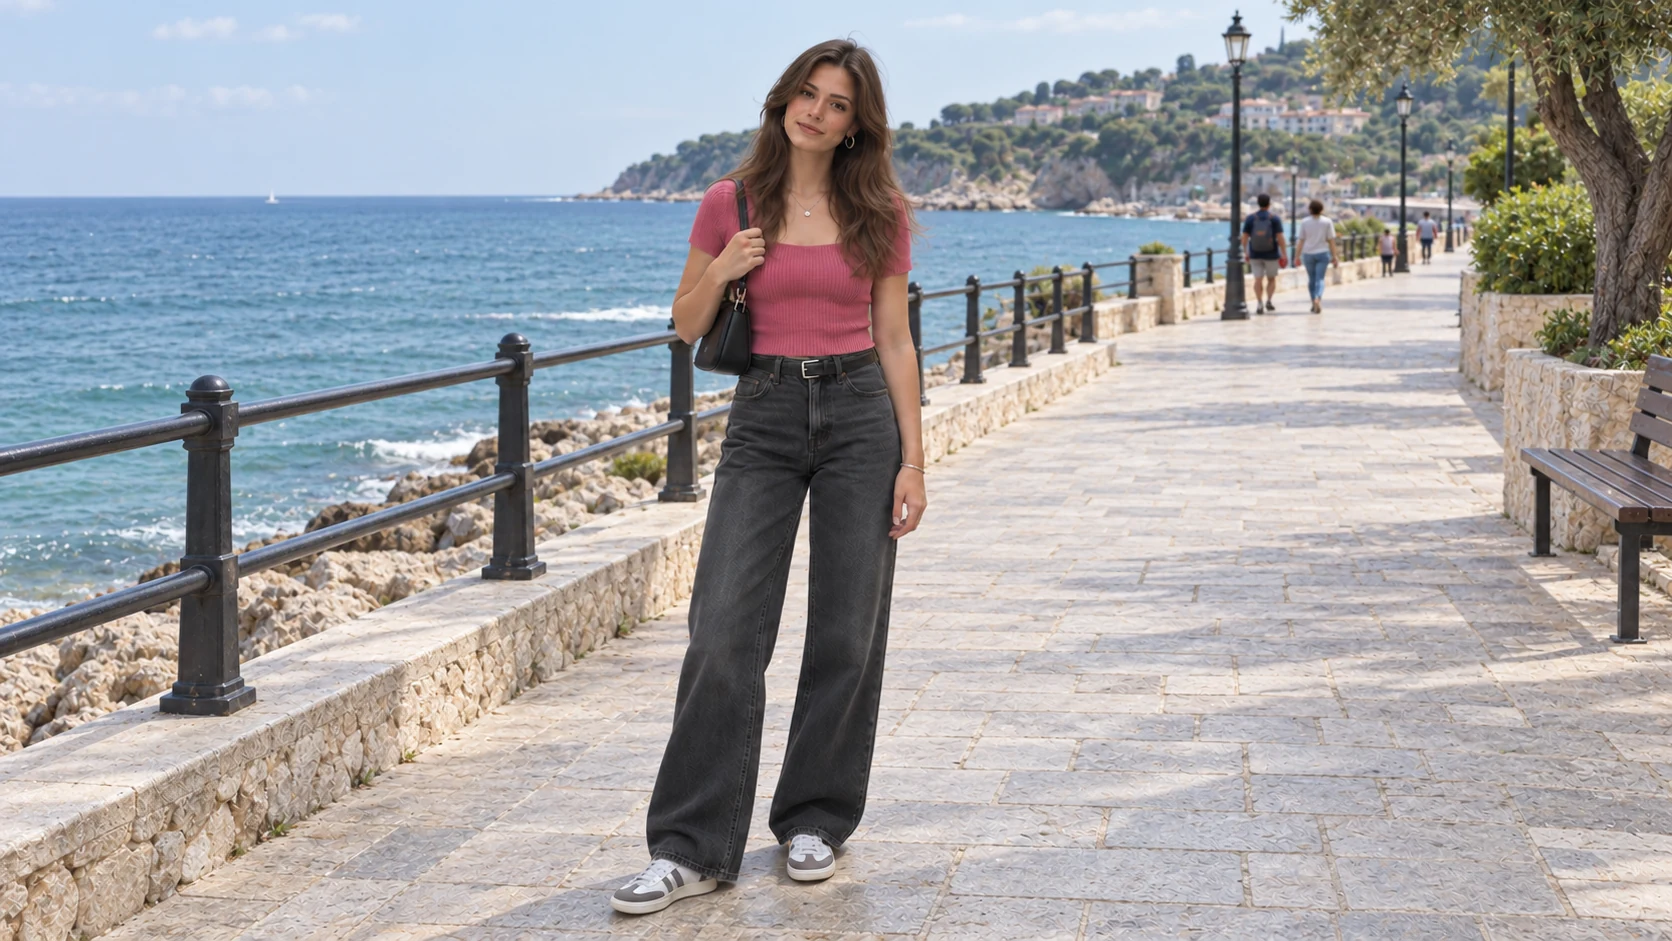
AI-created illustrations prepared separately from the suggested prompt. For example 01, compare the face, hair, clothing, feet, and contact shadows with the reference.
Lighting Prompts
Describe the light change and its location rather than asking for a better photo.
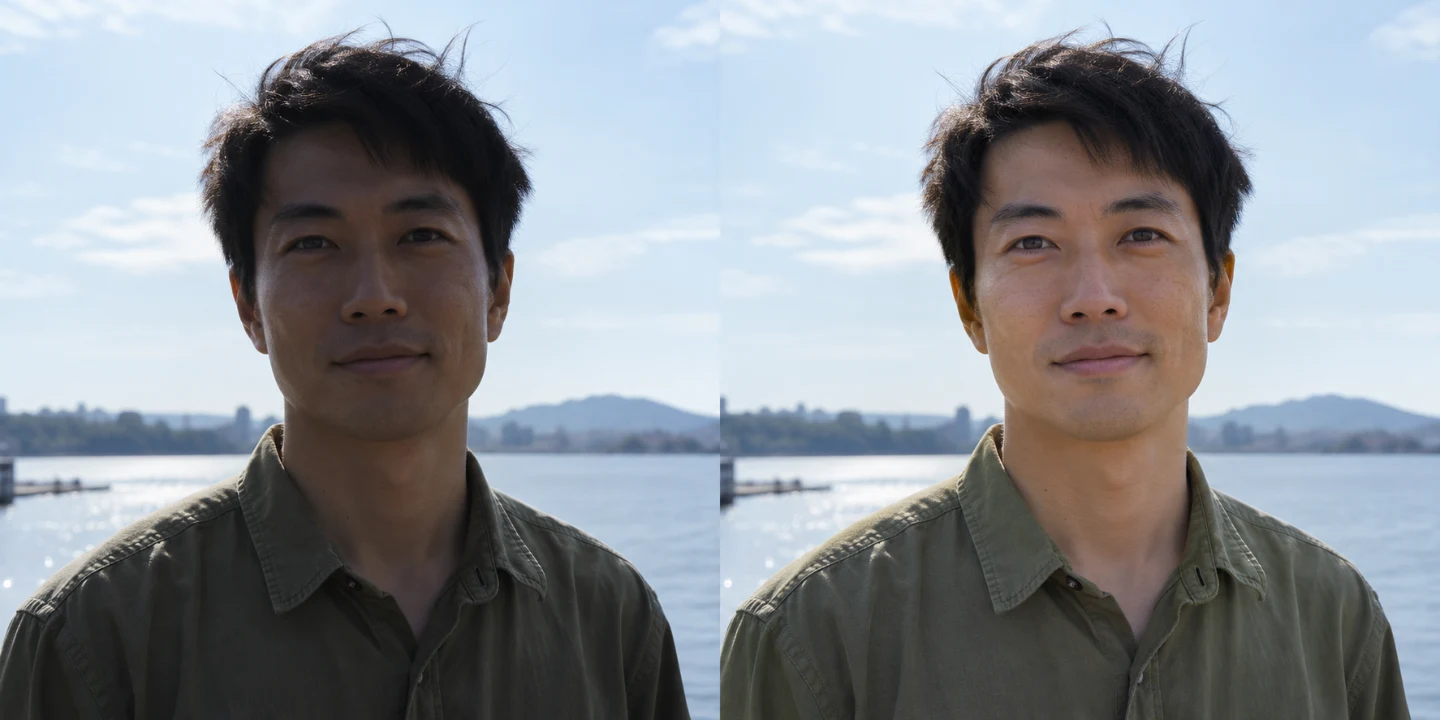
EXAMPLE 04 · PORTRAIT LIGHTING
Lift the face. Keep the bright sky in view.
- Natural skin texture
- Face-to-background transition
- Sky brightness and detail
Backlit Portrait — Lift the Face
The subject's face is underexposed due to bright backlighting; brighten the face and neck gently to a natural skin exposure while keeping the current bright sky from becoming brighter; preserve natural skin texture and the subject's facial shape; do not alter the composition.
If the source has no usable sky detail, newly generated texture is an estimate; compare to a clean original when accuracy matters. Inspect the transition between the brightened face and the surrounding image.
Yellow Indoor Cast → Neutral Daylight
Shift the warm yellow color cast across the entire indoor scene toward a balanced, neutral daylight tone; preserve the room's contents and their relative colors; do not over-cool into blue.
Compare expected neutral surfaces—white walls, white paper, gray objects—against the original to judge whether the correction reads as natural. If people are present, check that skin tones look plausible alongside those neutral references.
Hard Overhead Product Shadows → Softer Look
Soften the hard shadows cast directly below and to the sides of the ceramic mug; keep the mug's shape, glaze texture, and color; aim for the diffused look of a large softbox rather than removing shadows entirely.
Inspect the mug's glaze texture and color, and check that the softened shadows still read as physically plausible rather than erased.
Object Prompts
Identify one object, its position, and the surface that should replace it.
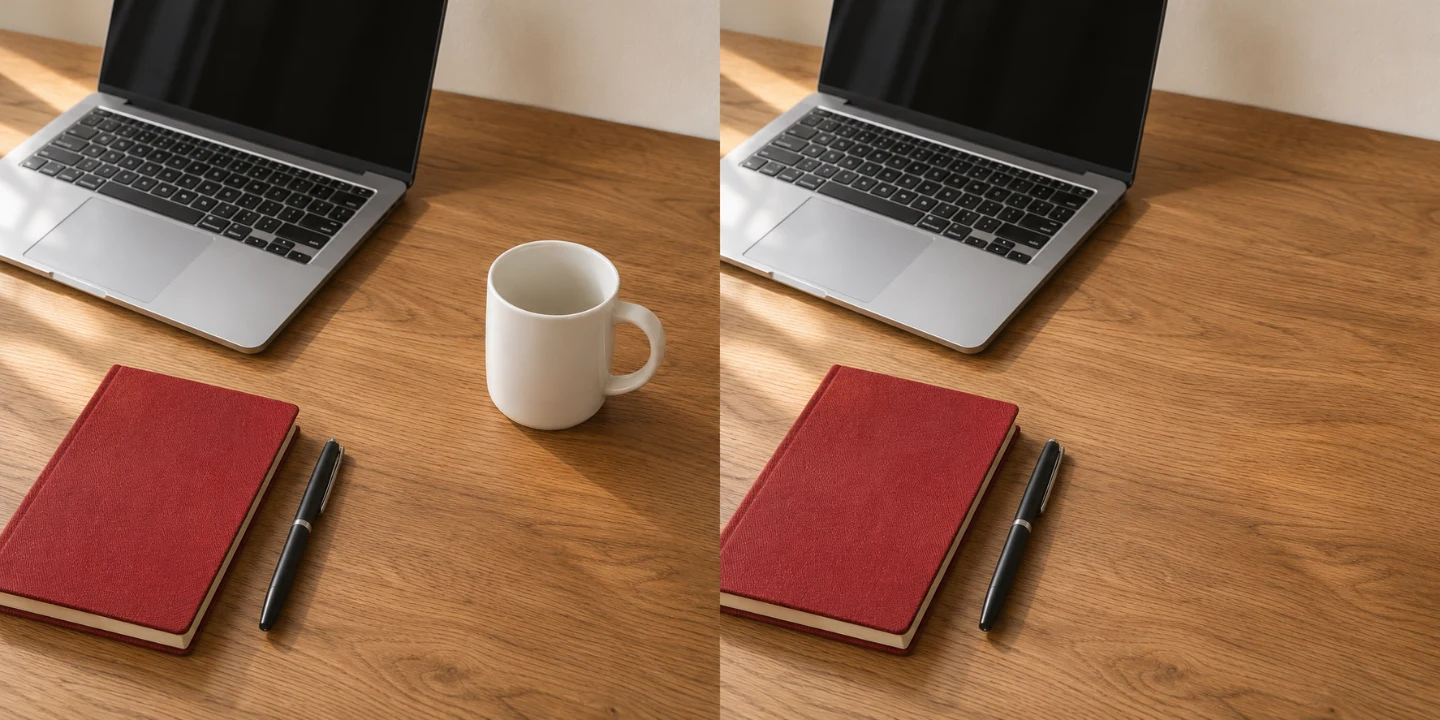
EXAMPLE 07 · OBJECT REMOVAL
Remove the mug. Continue the wood grain.
- Desk texture and tone
- The mug’s shadow removed
- Laptop and notebook retained
Remove an Empty Cup from a Desk
Remove the empty white mug on the right side of the desk; fill the area with the desk surface texture and color visible in the surrounding region; retain the laptop and any other objects; remove the mug's shadow and any reflection it casts, but keep shadows and reflections that belong to other objects.
Compare the desk surface tone where the mug was against the rest of the desk. Confirm the laptop's own shadow is undisturbed.
Remove an Isolated Background Bin
Remove the green recycling bin visible on the left side of the image, well away from the person; replace it with the pavement texture that logically continues behind it; do not alter the person or the foreground.
Inspect the filled area for plausible pavement continuity—texture, tone, and any pattern lines. Confirm the person's outline, particularly arms and shoulders, is undisturbed.
Change a Notebook's Cover Color
Change the red notebook cover on the desk to dark navy blue; keep the notebook's size, position, and any text or design on the cover in their original locations; do not change the desk, laptop, or other objects.
Verify any text on the cover closely against the original. Confirm the notebook's size and position are unchanged and surrounding objects are unaffected.
PUT A PROMPT TO WORK
How to Try These in PhotEditor
Use the reference-photo editor on the PhotEditor homepage. Your selected photo is uploaded when you submit an edit.
Open the photo editor- 1Open the homepage reference editor and click Upload image. Load a photo you own or are authorized to edit in JPG, JPEG, PNG, or WebP format, up to 10 MB.
- 2Paste a selected prompt into the Prompt field. Adapt any color, position, or subject details to match your source image.
- 3Set Aspect Ratio to the option closest to your original's proportions. Resolution options include 1K, 2K, and 4K; review the displayed credit cost before proceeding. For current pricing, see the Pricing page.
- 4Sign in and ensure you have enough credits, then click Generate Image.
- 5Compare the edited area and check faces, text, framing, and unchanged areas against your reference.
If you want to run the same prompt again, another successful run uses additional credits, even if you dislike the result.
To compare independent variations, run each prompt against the same original reference image so edits don't accumulate.
Troubleshooting
Use the result to make the next instruction more precise.
Wrong area edited
Add a positional description ("on the right side of the desk," "in the background behind the person") and name what must not change.
Unwanted changes to the subject
Check for conflicting instructions—for example, requesting a large area change while demanding all existing shadows stay exactly as they are. Revise ambiguous wording rather than adding more constraints, and compare the result with the original.
Invented detail
If the region you want to fix is heavily compressed, out of focus, or fully overexposed, the model works from limited information. Seek a cleaner original when accuracy matters; no prompt can verify detail the image never contained.
BEFORE YOU START
Frequently asked questions
Can I prepare a prompt for free?
Yes. You can write a prompt and load a reference photo before signing in. Processing requires an account with enough credits. Trial eligibility and any available allowance are shown in your account.
Do these prompts need a reference image?
Yes—these prompts are written for the reference-photo editor. If you want to create an image from a text description alone, the AI Image Generator is a separate tool that requires no upload.