
How to Remove a Date Stamp from a Photo: A Step-by-Step Guide
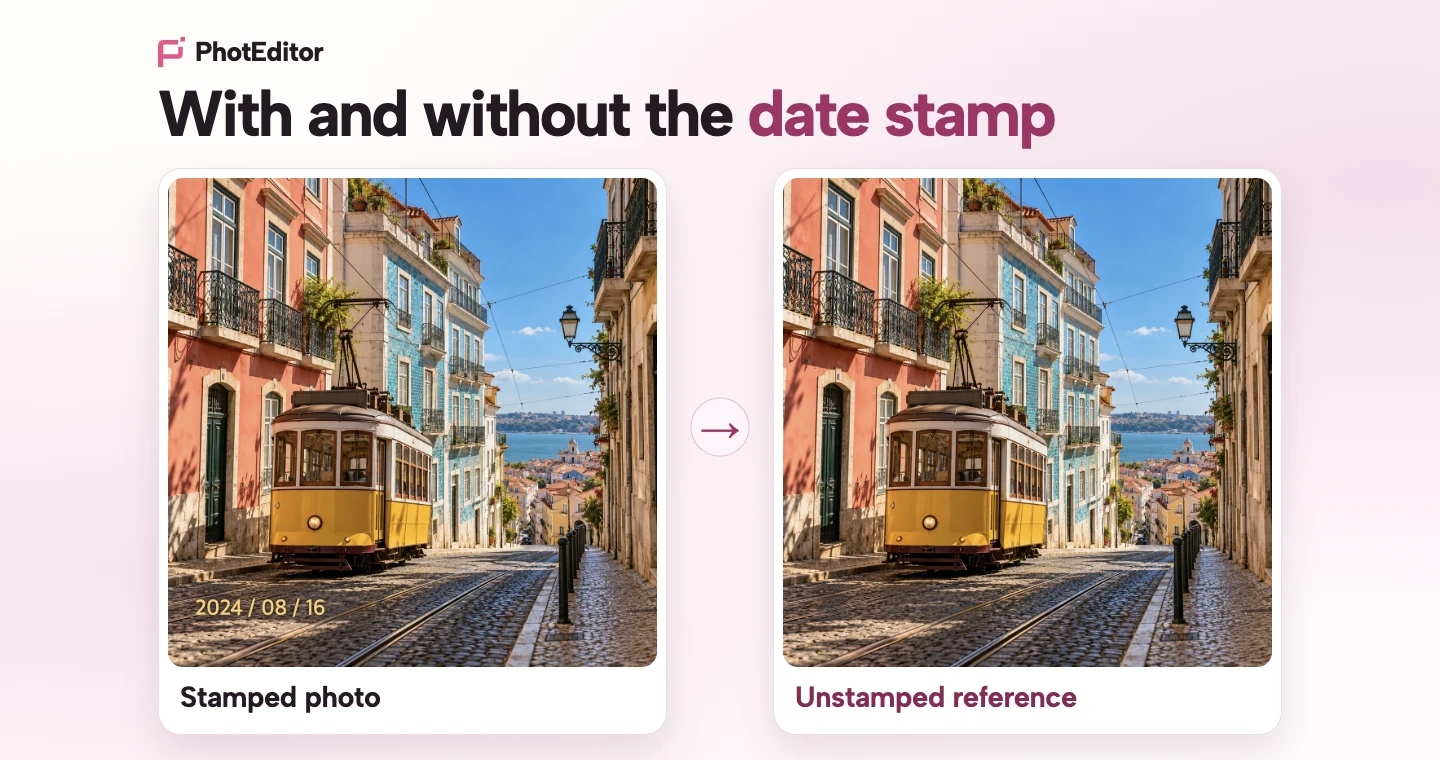
To remove a date stamp without cropping, select the numbers and let an AI editor rebuild that part of the picture. In PhotEditor, use Manual Erase with the Rectangle selection tool, then check the result before saving. This guide covers dates visible on the photo itself, not the capture date stored in the file’s metadata.
Choosing the Right Method for Your Photo
Different photos call for different approaches depending on where the stamp sits and how much manual editing you want to do.
| Method | When it makes sense | Trade-off |
|---|---|---|
| Cropping (Standard photo editor) | The date sits along an outer margin where trimming an edge does not cut off important subjects. | You lose part of the original frame. |
| Manual retouching (Desktop clone stamp or healing brush) | You have photo editing experience and want direct control over blending textures. | Requires manual brushwork, sampling matching areas, and practice to blend complex grain. |
| AI removal with a selection (PhotEditor AI Watermark Remover) | You want to keep the photo framing intact without manually painting replacement textures. | Reconstructs the covered area based on nearby context; cannot reveal original scene details covered by the date. |
Step-by-Step: Removing a Camera Date with PhotEditor
PhotEditor provides a browser-based workspace to remove unwanted timestamps. Here is how to set up your image and select the date.
Before You Begin
- Supported formats: JPG/JPEG, PNG, and WebP.
- File limits: Up to 10 MB and up to 24 megapixels (MP).
- Tip: Keep a copy of your original. If you can find a version without the date stamp, use that instead of reconstructing covered details.
- Usage rights: Only edit photos you own or have permission to modify.
- Account requirement: You can load a photo into the editor and prepare a selection before signing in. Processing requires an account with enough credits.
Step 1: Load Your Photo
Open the PhotEditor AI Watermark Remover. Drag your file into the workspace, or click Select File to choose a file from your device.
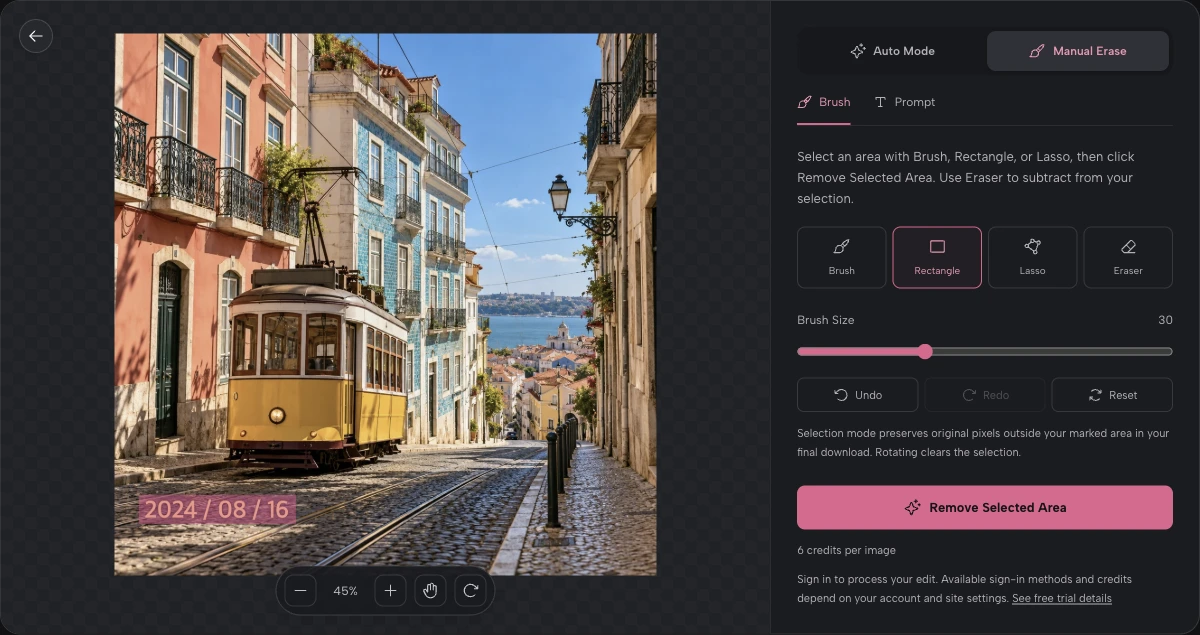
Step 2: Select Manual Erase and the Brush Tab
Once the photo loads in the editor:
- Choose Manual Erase.
- Ensure you are on the Brush tab.
PhotEditor states that the final download preserves original pixels outside your selection when you use these selection tools. This does not apply to Auto Mode or Prompt edits, which may change other details.
Step 3: Draw a Box Around the Date Stamp
In the Brush tab toolbar, select the Rectangle tool:
- Click and drag a rectangular box over the stamped numbers.
- Keep the box close to the text, but ensure any colored glow or soft outer edges around the numbers are completely inside the box.
- Use Eraser to subtract any accidentally selected area that is not part of the date or its outline. The Eraser removes areas from your highlighted selection; it does not erase photo pixels.
- If you need to clear the highlighted selection and start over, click Reset.
Step 4: Check Credits and Submit
Check the displayed credit cost and make sure you are signed in with enough credits. See the Pricing page for current credit packs.
Click Remove Selected Area to start processing.
Step 5: Inspect and Download
Once processing finishes:
- Use the before-and-after slider in the editor to inspect the filled area.
- Download the finished image to your computer.
- Open the file in your default image viewer to inspect the edited corner at full size.
What to Look for When Inspecting Your Edit
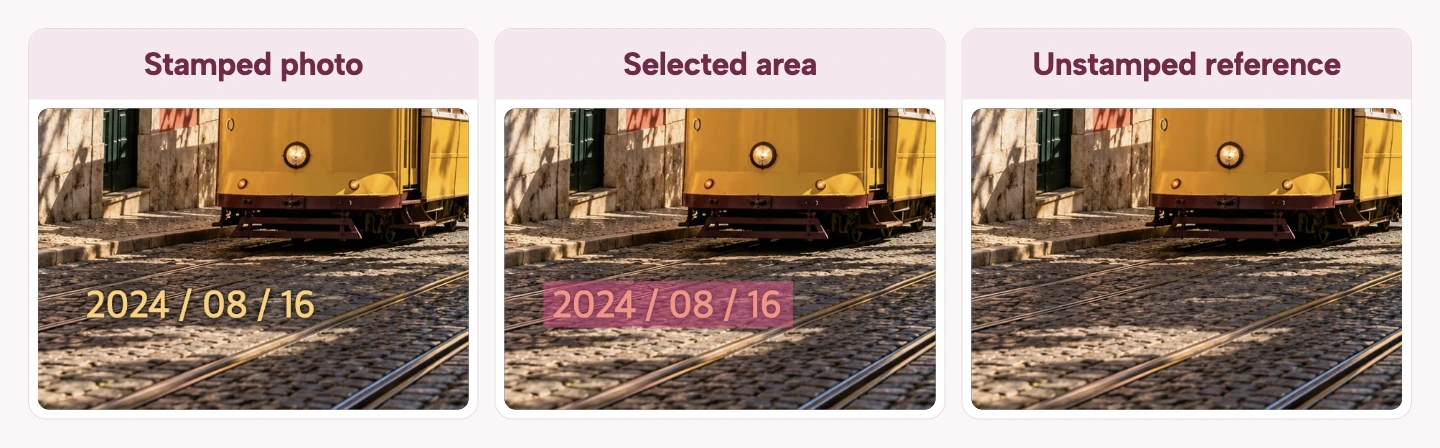
Because the tool generates replacement pixels from the surrounding visual context, results vary based on what was behind the stamp:
- Flat backgrounds (such as open skies or plain walls): Look for subtle color patches, uneven lighting, or faint boundary lines across the filled area.
- Textured backgrounds (such as grass, sand, or foliage): Look closely to see if the new patch matches the surrounding texture or looks blurred and repetitive.
- Subject edges and straight lines (such as shoes, clothing hems, or architectural borders): Check whether straight lines bend or soften where the stamp crossed them.
Troubleshooting Imperfect Edits
- Residual marks or glow: Compare the result with your original selection. If any digits or soft colored glow fell outside the box, include them on another attempt. If the whole date was already selected, making the box larger may not help. Start again from the original if you want to try a different selection.
- Distorted edges or covered subjects: When a stamp crosses faces, hands, or detailed objects, the editor must estimate what was behind the numbers. If the patch looks unnatural, cropping the edge or using manual retouching may work better.
- Credit usage: Another successful run uses more credits, even if you do not like the result. Always check the displayed cost before trying again.
Frequently Asked Questions
Can I remove a date stamp for free?
You can load a photo and prepare your selection at no charge. Processing the image requires signing in to an account with enough credits. Trial eligibility varies by account; check the free trial page to see current options.
Can I do this without cropping?
Yes—PhotEditor’s selection workflow lets you target the date without trimming the edges of the photo. The selected area is reconstructed, so check that it fits the surrounding scene before keeping the result.